New Features: User Permissions and Approval Workflow
At some point you may want some team help and need to add users to your Checkeeper account. We've made it pretty easy to do so, along with the ability for you to adjust the user access to specific features in the application. If you're ready to get your team on board, follow along to see how it works!
Editing User Permissions
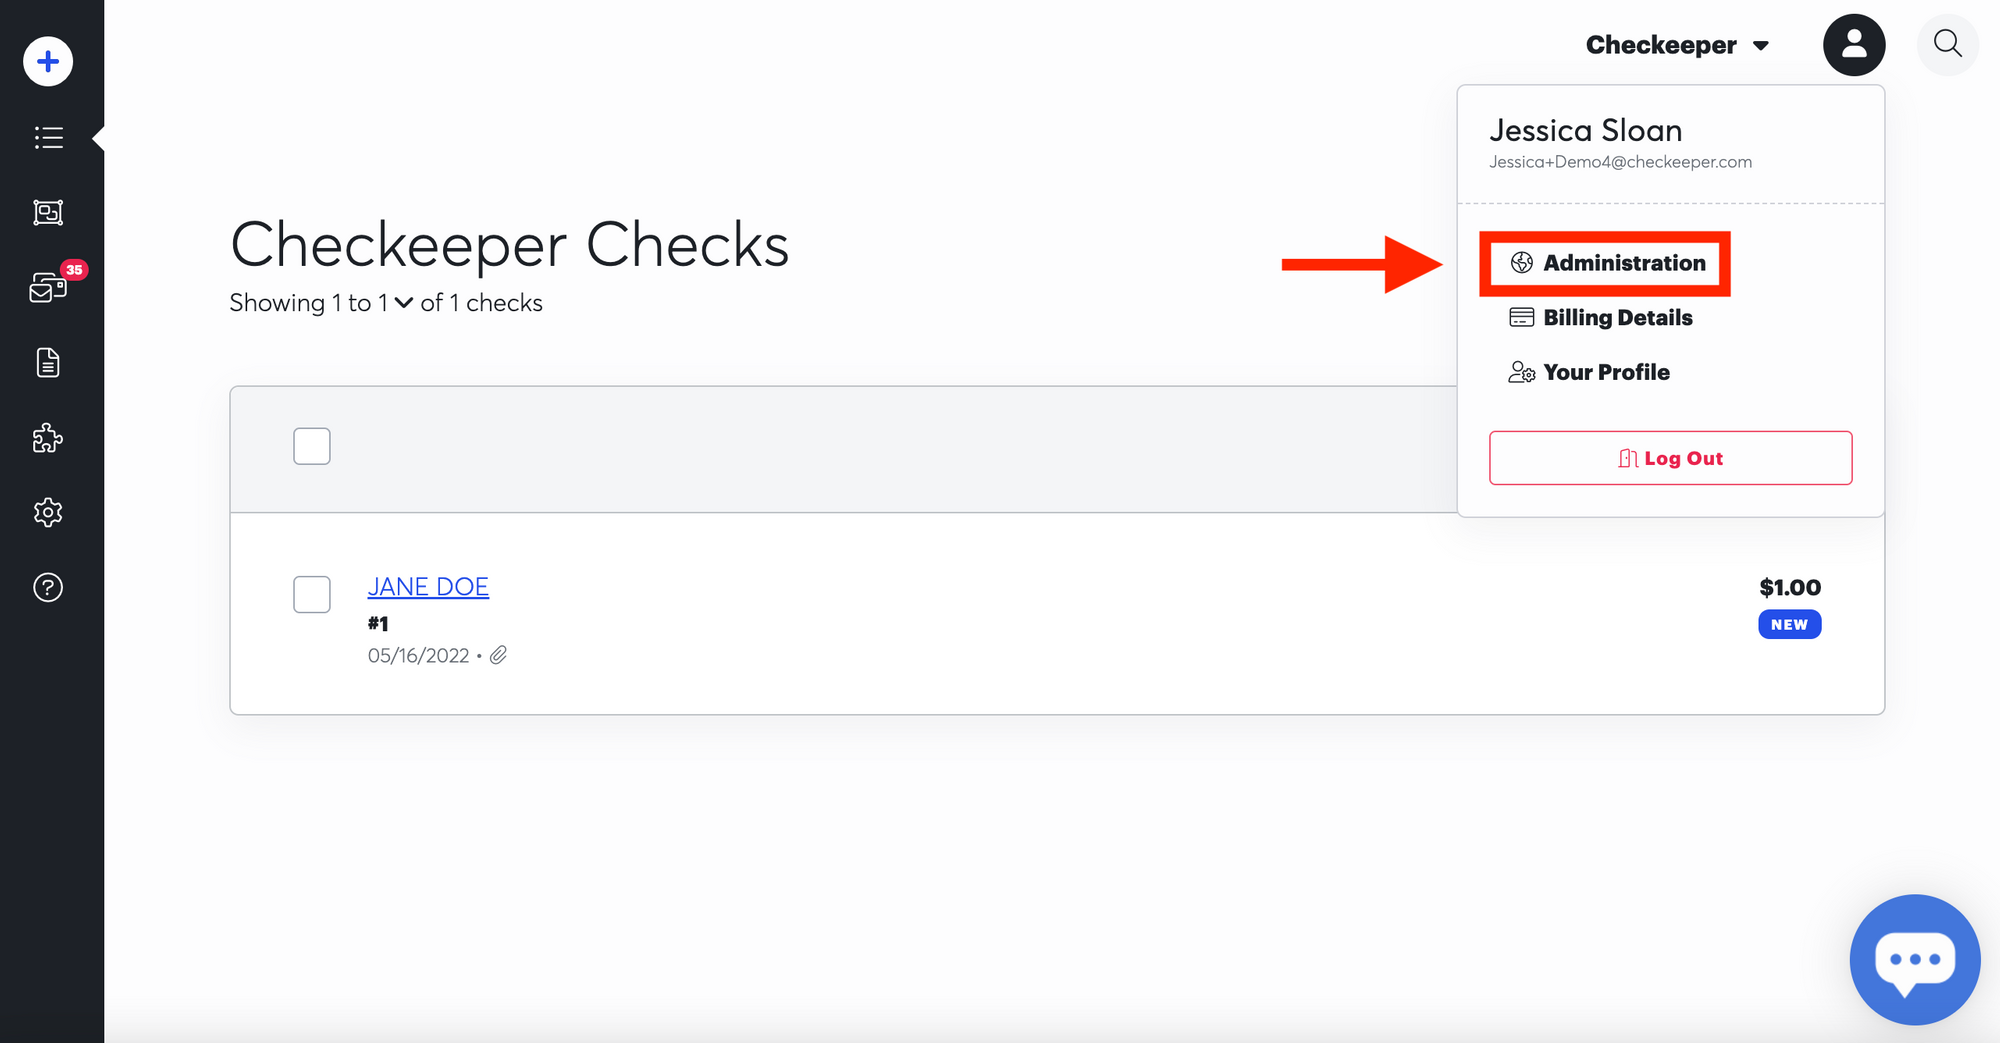
First things first, log into your Checkeeper account. Click on your user icon in the top right corner, this will lead you to all of your personal account info. Click on "Administration".
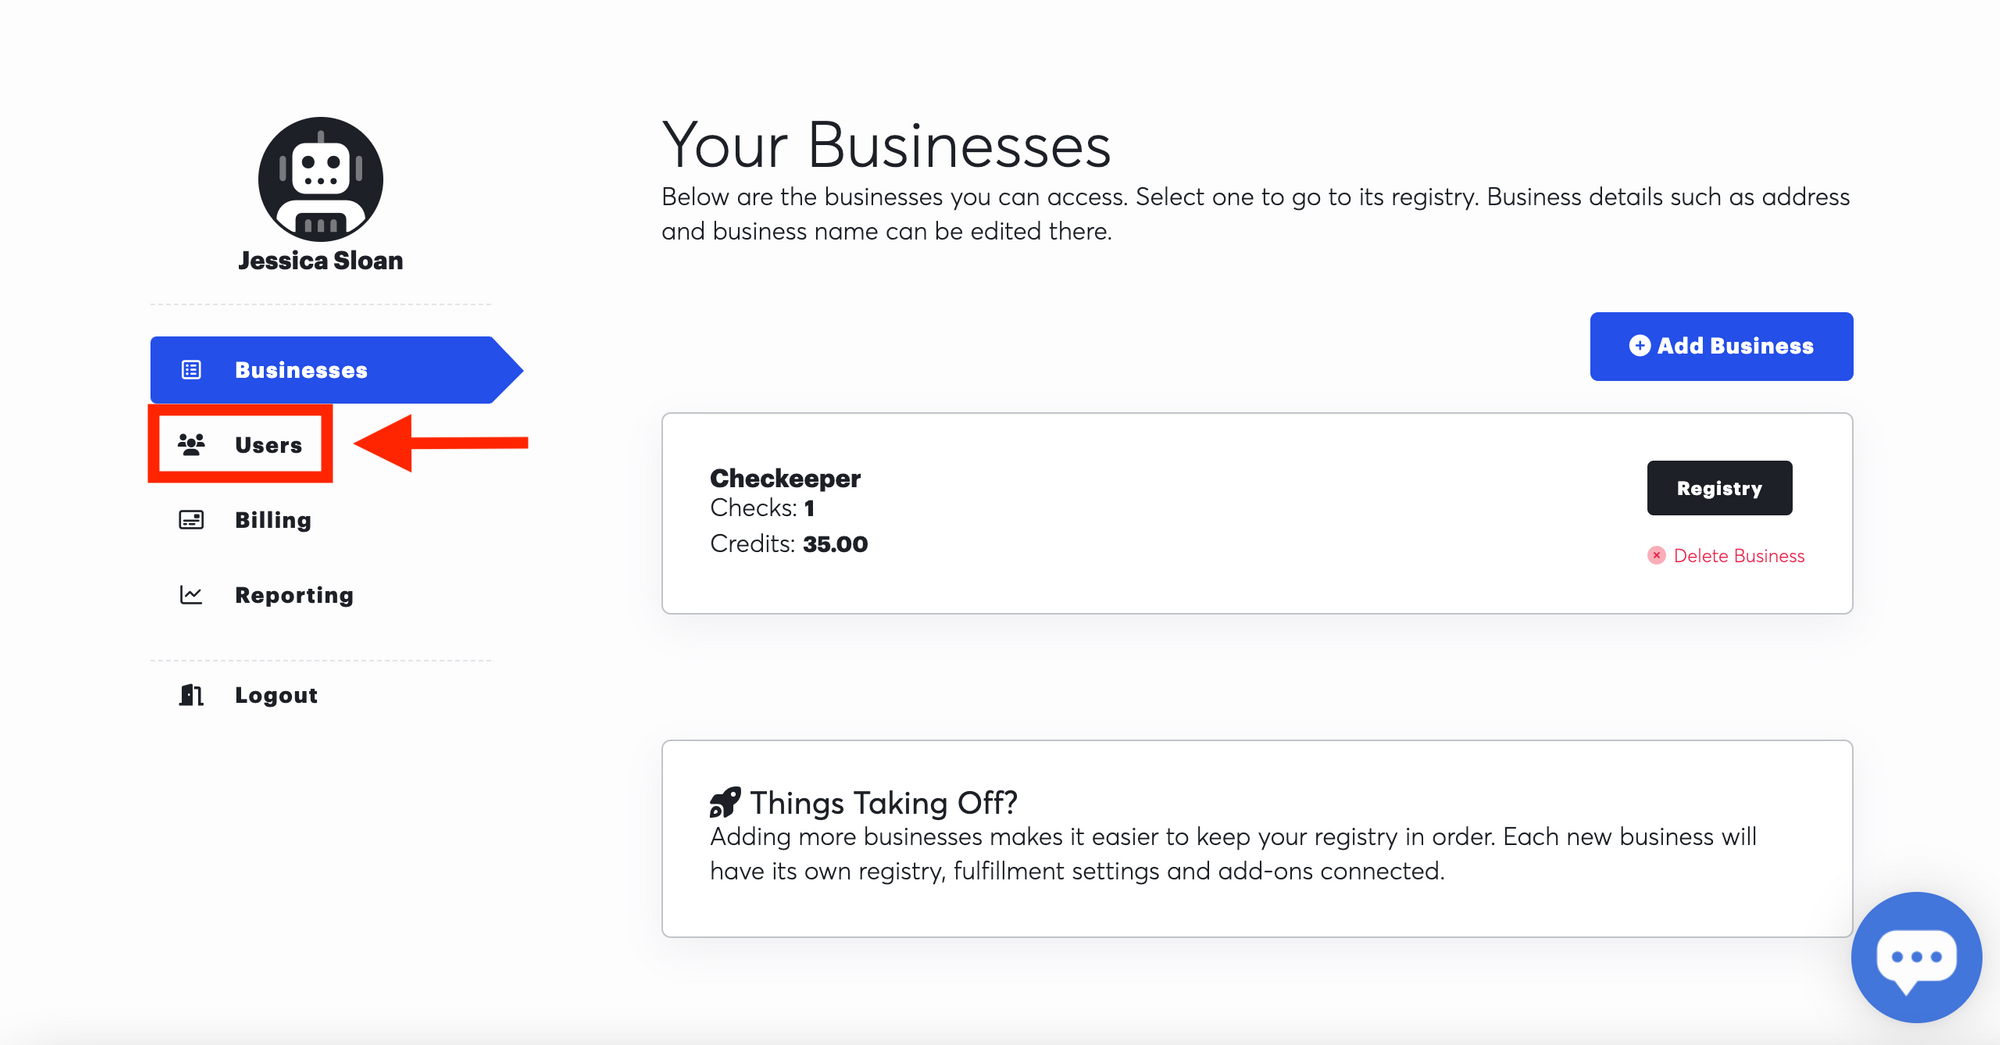
Once you're on the administration page, you will see your businesses, users, billing information, and reporting. Click on the "Users" tab.
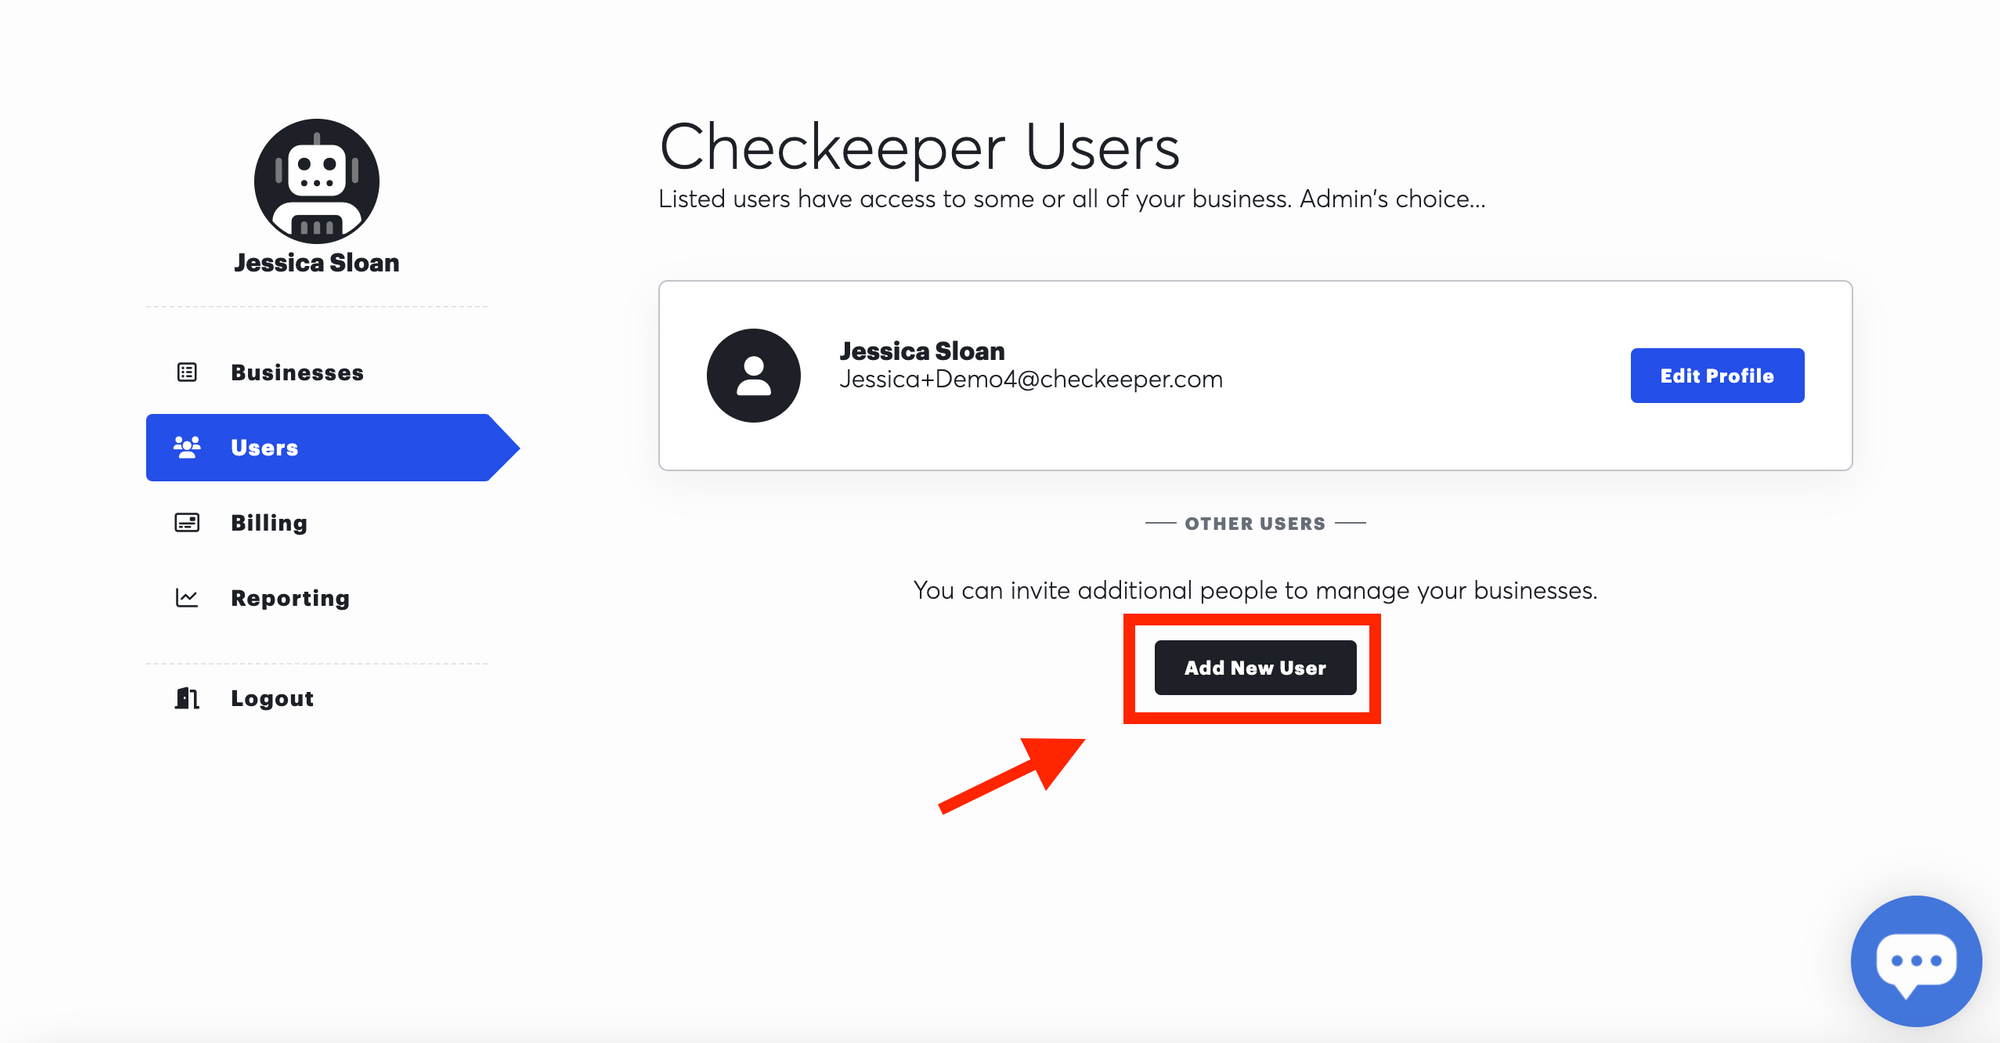
On this page, you'll see all active users on your Checkeeper account. If you'd like to add a new user click "Add New User".
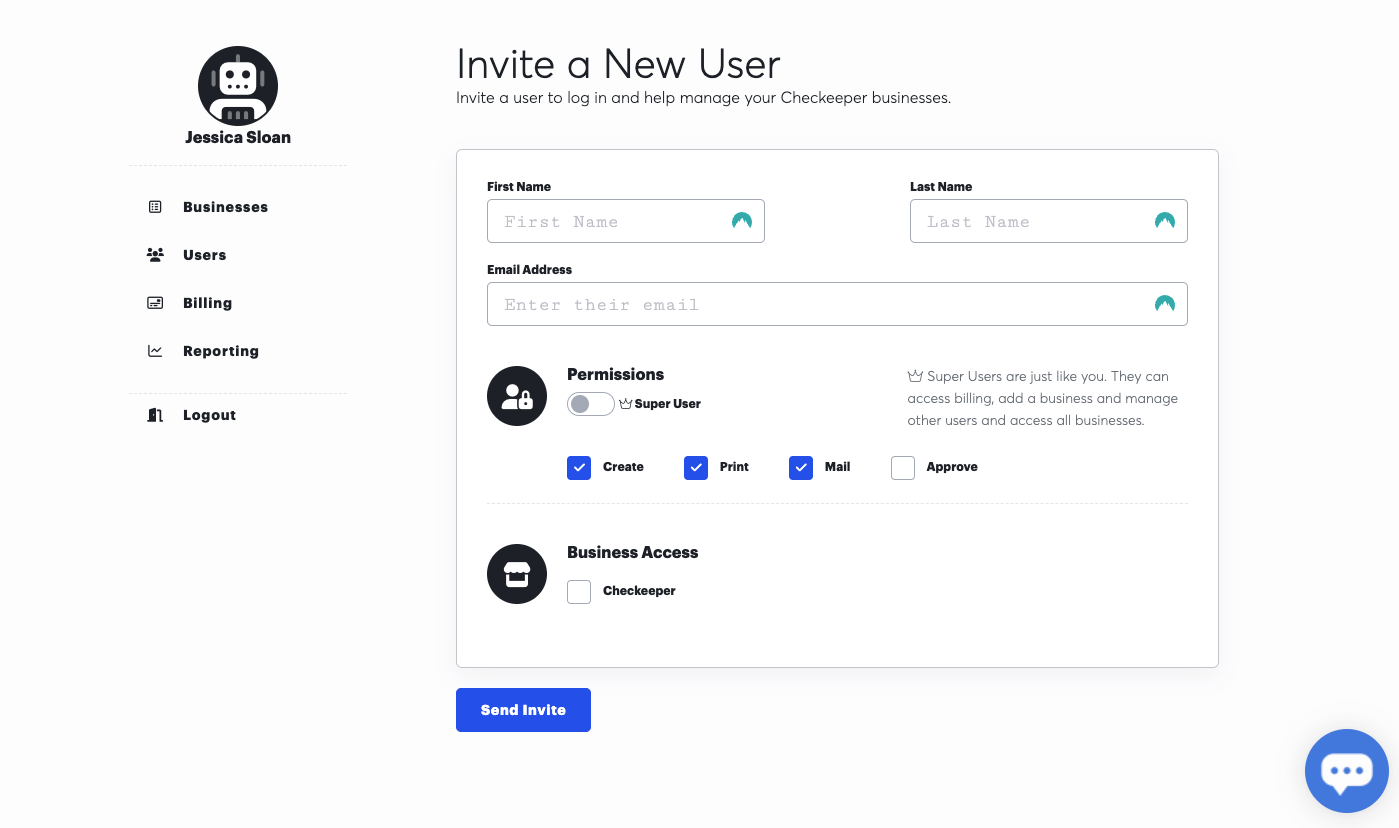
You will enter the full name and email of the user you would like to add. You can also edit their ability to access specific features such as creating, printing, mailing, or approving checks (keep reading for more approval flow tips). These can be chosen in any combination you'd like by checking or unchecking each box.
If you'd like them to have just as much accessibility as you have on the account then you will turn on "Super User". This will allow them to access billing, add a business, manage other users and access all businesses on the account. Lastly, you will choose which business you would like to allow them to access. Double check all info is correct & hit "Send invite". If you would like someone to be added as just a viewer of the account, add them in but uncheck all of the boxes and only check the business box.
You will now see them listed as a user. The next step is for them to verify their email. They will receive an email from Checkeeper which they will need to open and access their account within 48 hours or the link will expire. Once they have created their account, they will now be able to access it to the extent you have set for them. You can always go back into your user settings & click "Manage" to the right of their username to either delete them, authorize more or less accessibility to the user, or resend their invite.
Approval Workflow
If you'd like to have the checks approved by someone on your team before they are printed or mailed out, head over to your account settings. You will see a toggle listed as "Checks Require Approval", switch it on and it will turn blue. Only Super Users have access to this feature.
Checks created before this is toggled on do not require approval and can be printed/mailed by any user with printing and mailing permissions.

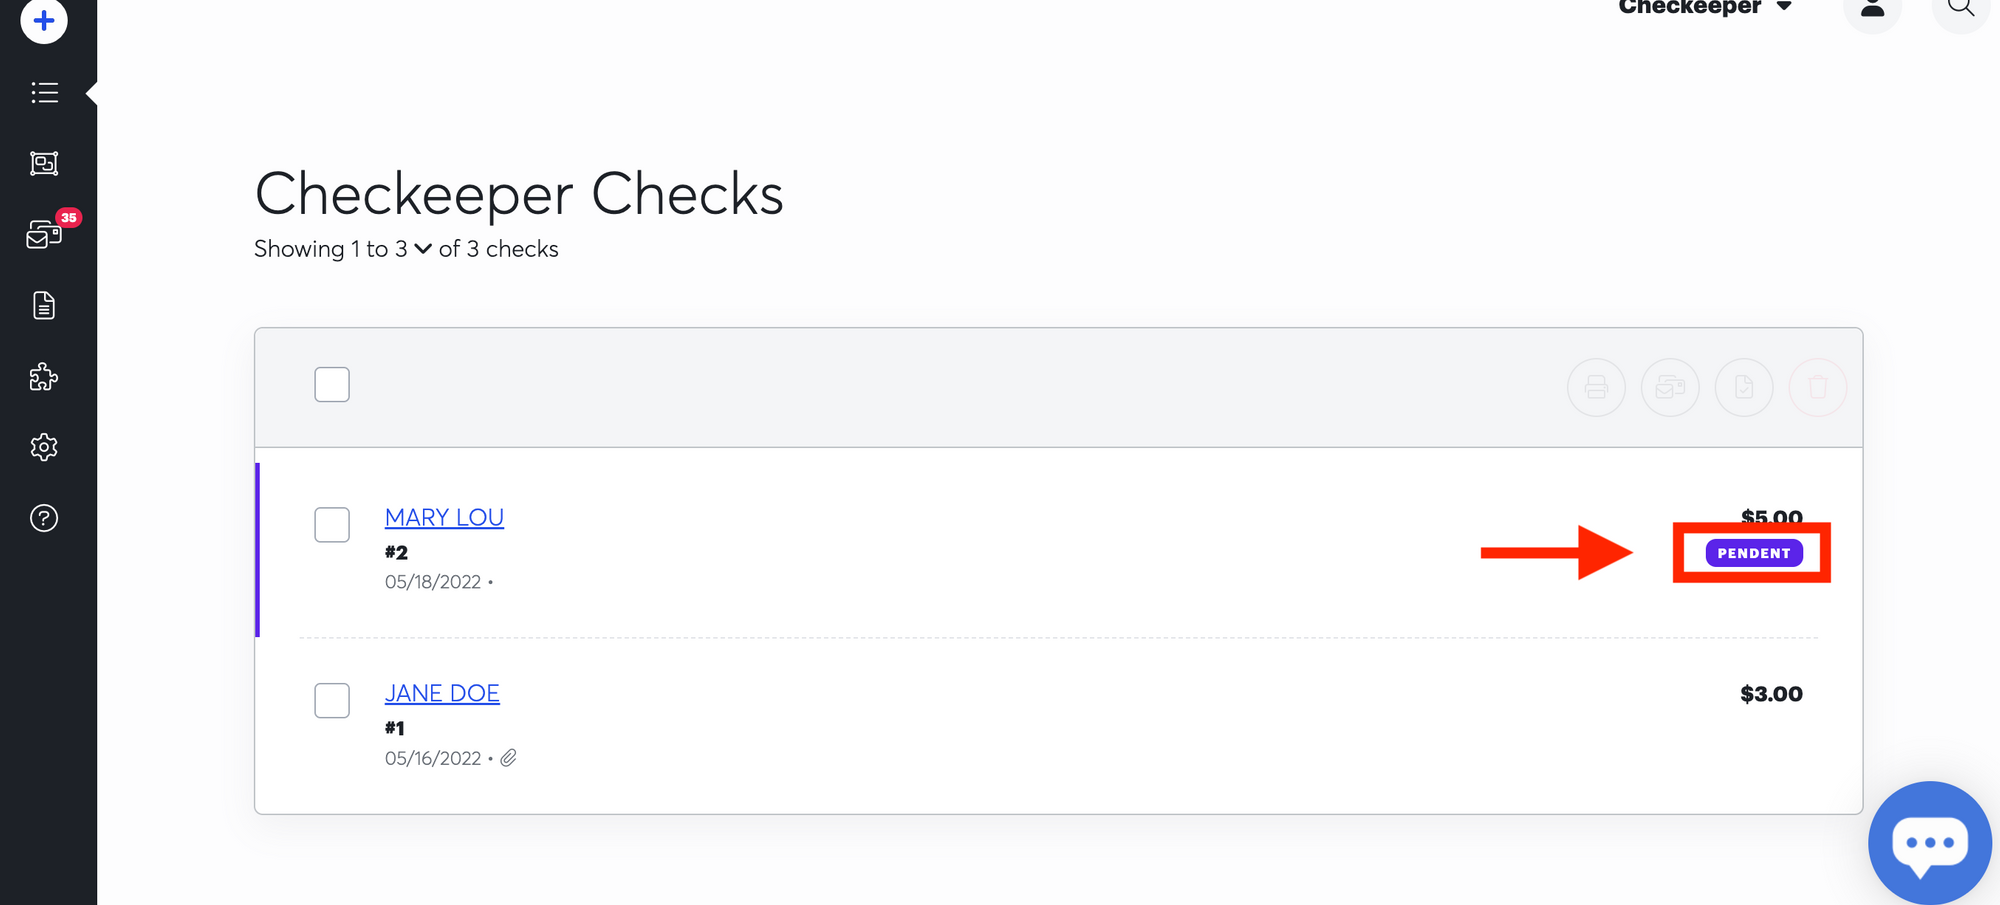
From this point forward, all new checks will have a purple "Pendent" tag next to it in the Check Registry; this indicates that the check needs to be approved. The check(s) cannot be printed or mailed until a Super User or a user with approval permissions has approved the checks.
To approve this check, hit the check box to the left of it and you will see an approval symbol appear to the top right corner of it - click that.
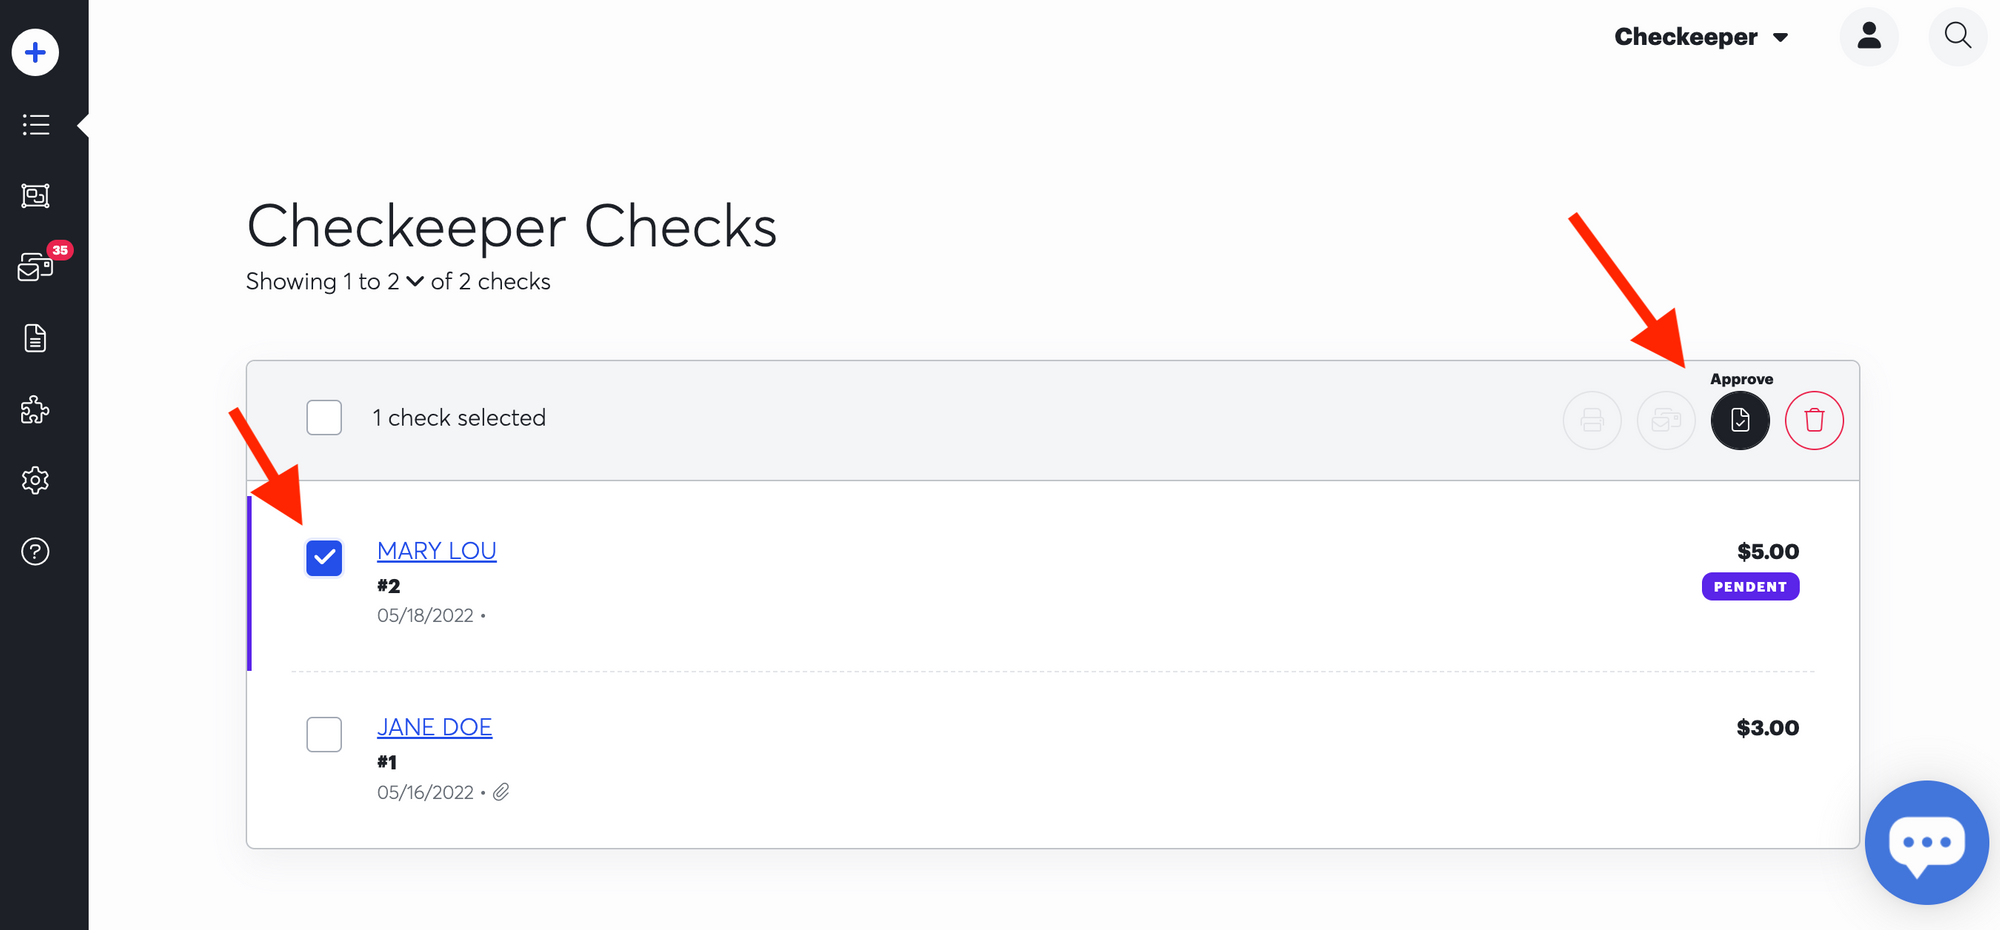
After clicking "Approve", users with print permission can print it and users with mail permission can submit it for mailing. To bulk approve checks, you can select the check box at the top of the registry, and all pending checks will be approved.
I hope you found this article helpful when growing your Checkeeper account, if you have any questions please reach out to our support team during normal business hours at [email protected]