How to Create a Checkeeper Account

Welcome to part one of Checkeeper's New User Starter Pack: How to Create a Checkeeper Account. Here, we'll be walking you through the entire account creation process from start to finish so you can start writing checks the better way.
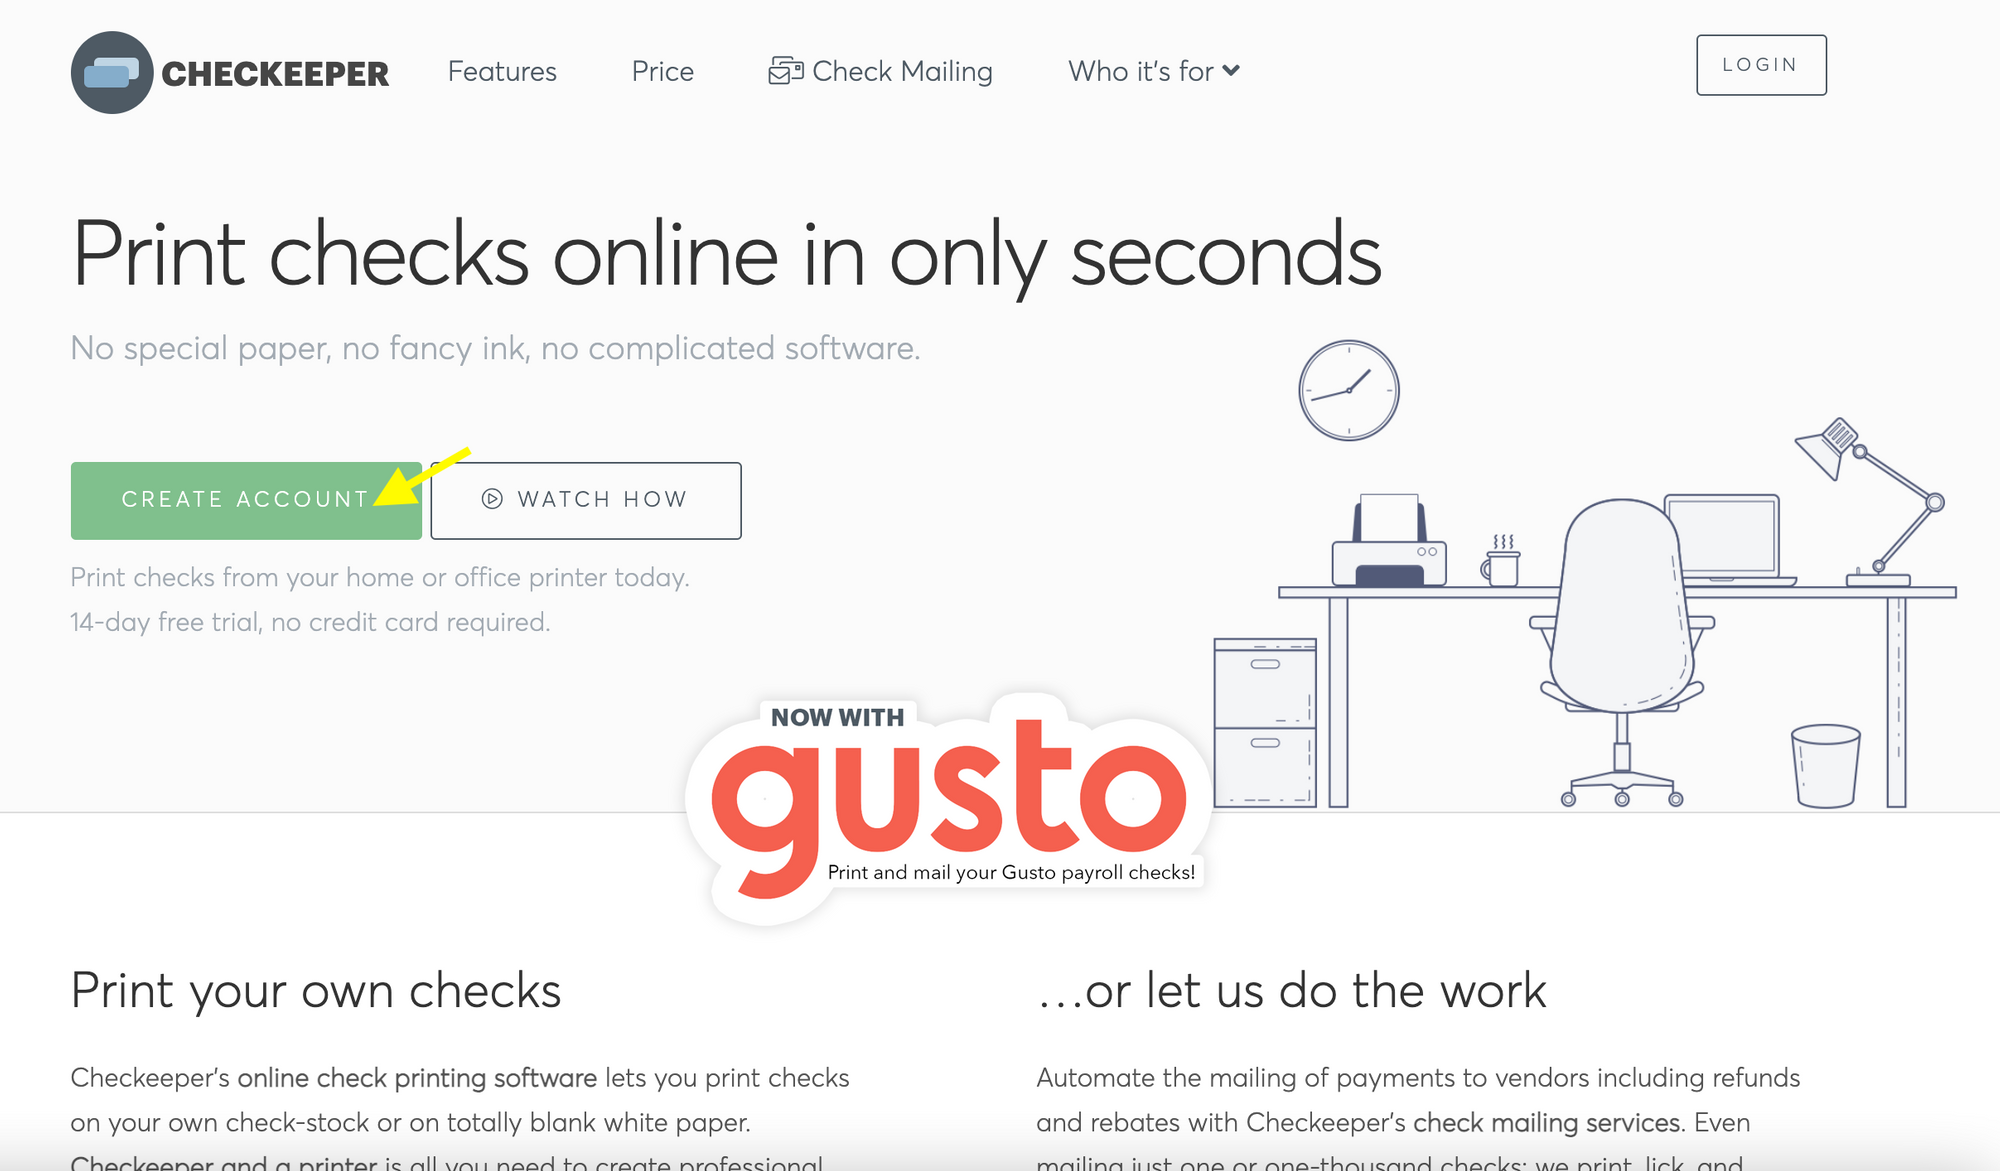
To get started, visit checkeeper.com, and click the green CREATE ACCOUNT button located in the middle of the page.
Enter your first and last name, the email address you want associated with your Checkeeper account, and a strong password. (If you ever forget the password to your Checkeeper account, you can create a new one easily on the login page.)
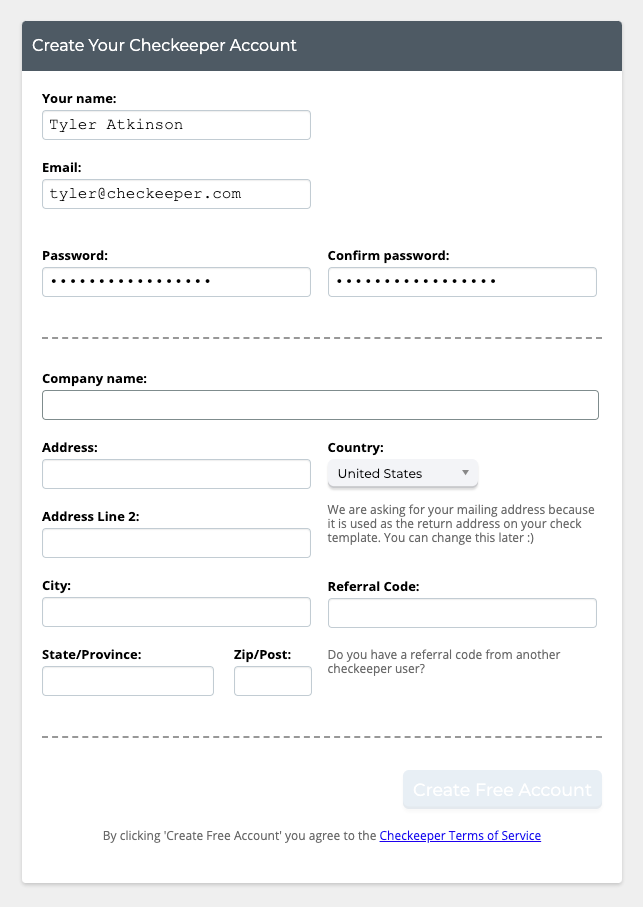
The next section of the account creation process is where you will set up the return address as you want it printed on your checks, so make sure you've entered all your information correctly! (You can update this information later under your account tab if necessary.) Enter your company name, your company address, and, since you’re reading this, enter the referral code, "HOWTO."
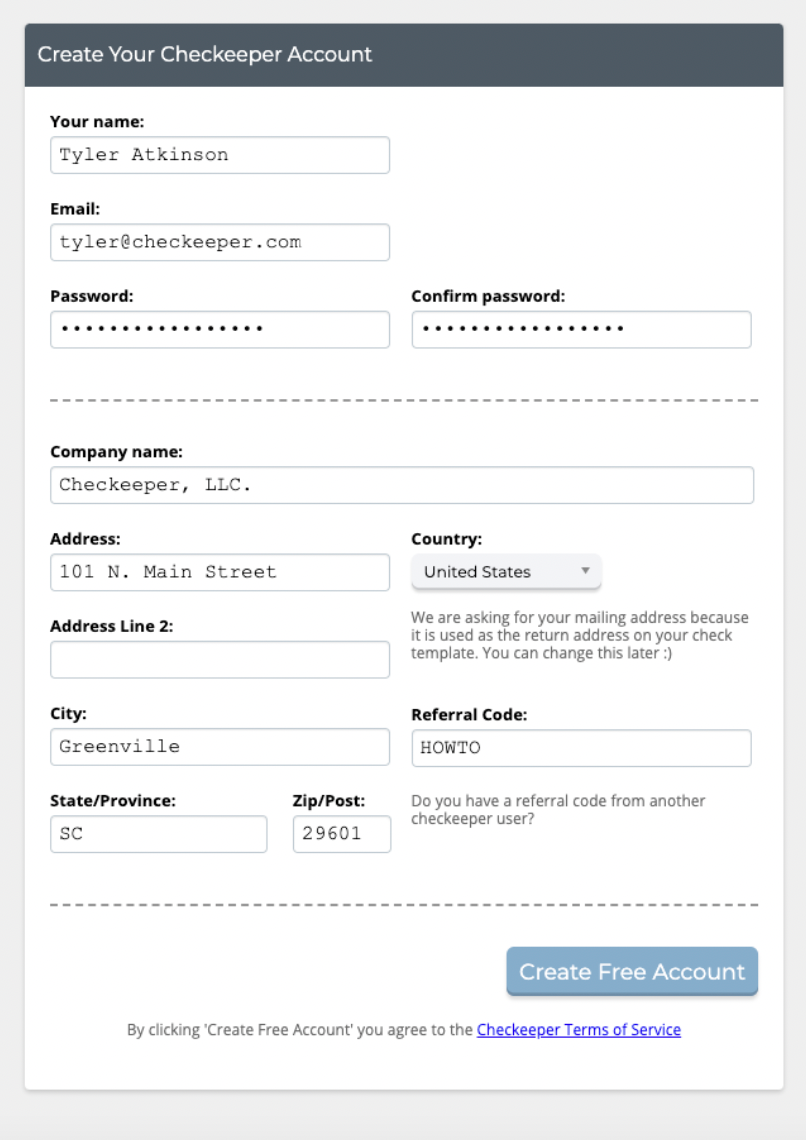
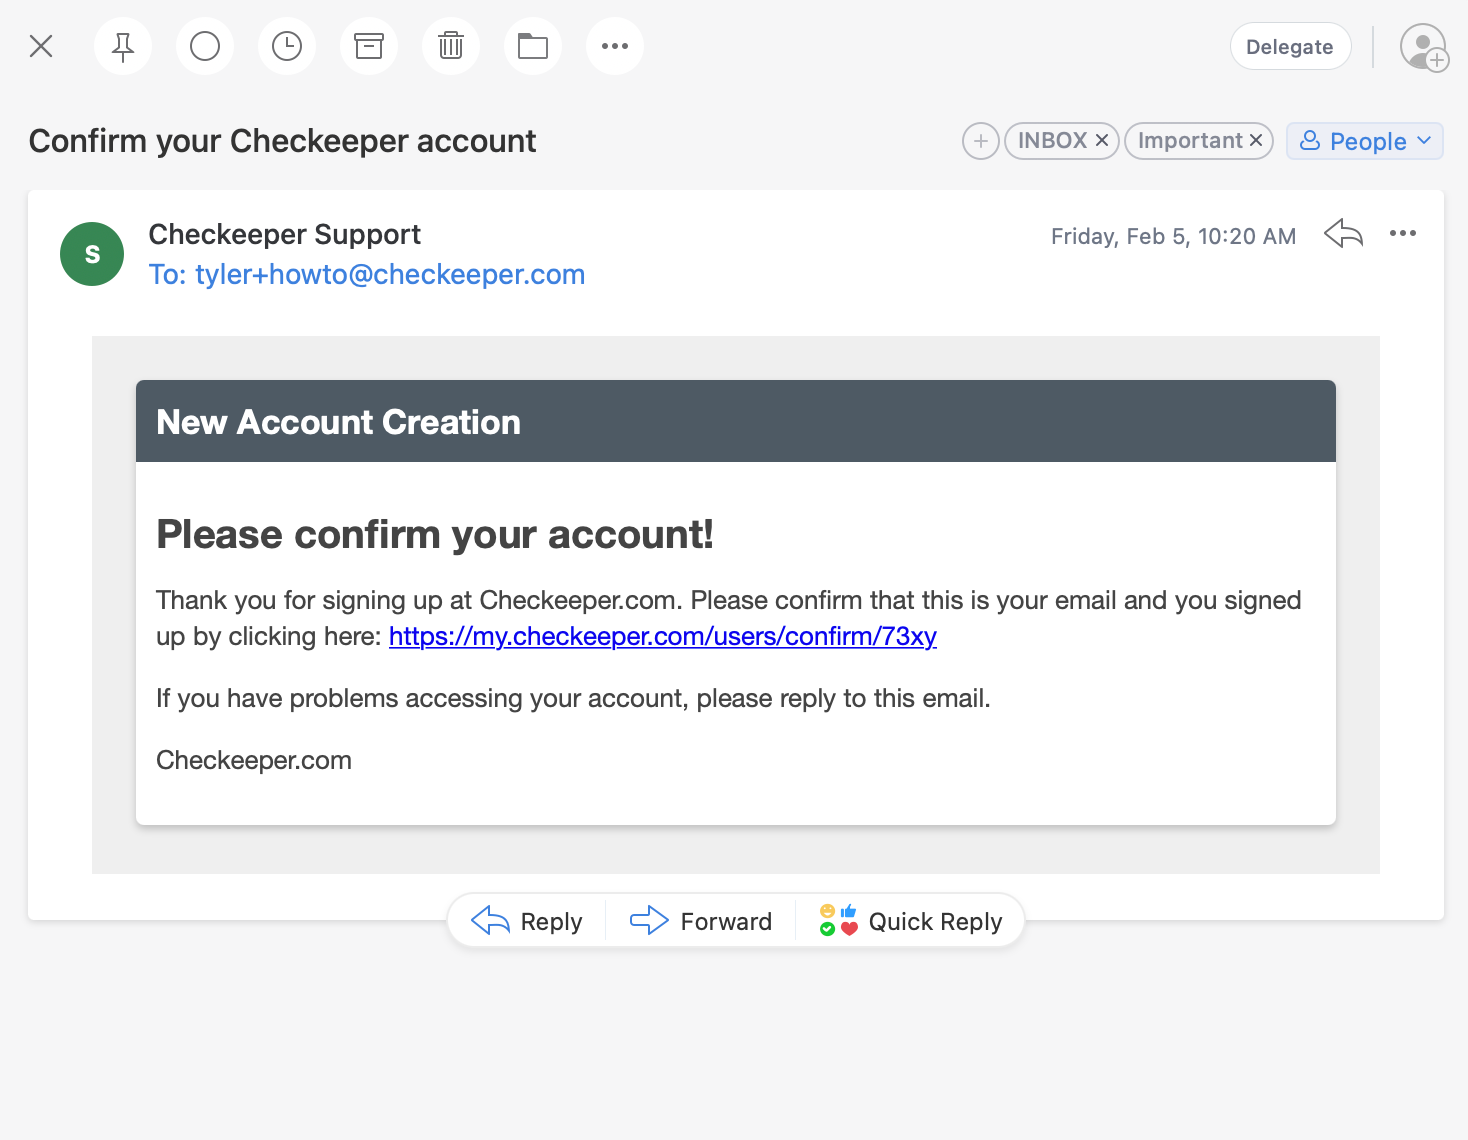
Once you have read and agreed to the Checkeeper Terms of Service, it’s time to start your free trial. Click "Create Free Account," and then check your email for an account validation link.
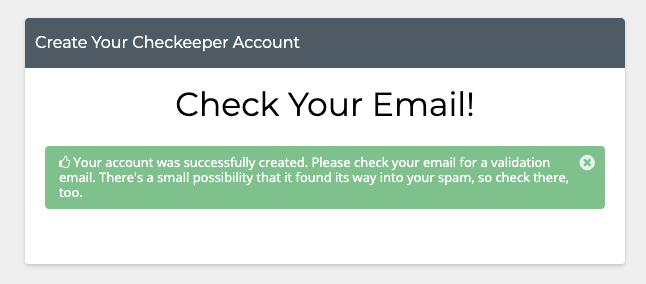
When you click the account verification link in your email, you’ll be routed back to the Checkeeper login screen. Now, it's time to enjoy your new account with Checkeeper-- the only secure way to print and mail checks online.

For more content and helpful tutorials, find us on Vimeo or visit our blog at Checkeeper.com/blog.