Accessing Your Complete Checkeeper History: 3 Easy Methods

Whether you're crossing all your year-end accounting T's, or you just like to keep accurate records on hand, you might find yourself wishing you could export a complete record of all your payments made through Checkeeper... Well, you can! And there are a few ways to do it.
Export Your Data After Performing a Search
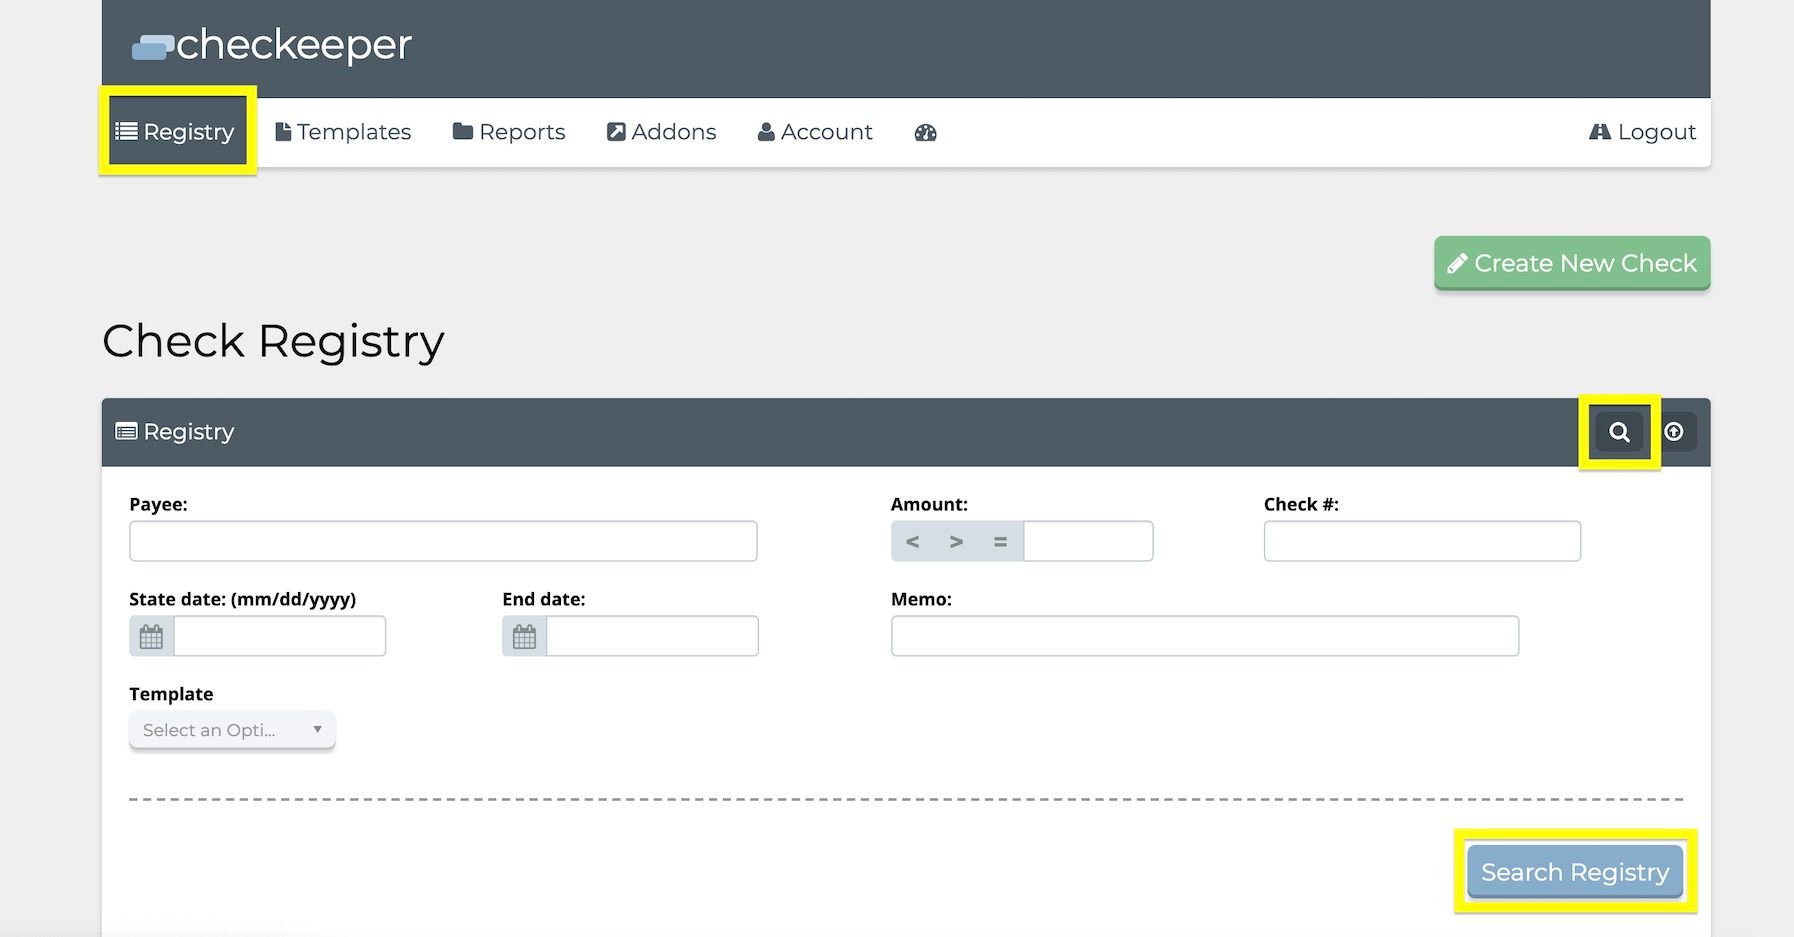
In your registry tab, you can perform a search by clicking the magnifying glass. If you do an empty search (that is, if you click "Search Registry" without inputting any specifications), the results will include a list of every check in your registry from the entire time you've been using Checkeeper. From here, simply click the link that says "Download Results as CSV," and boom. Ya got all your checks.
Download or Print Under the Reports Tab
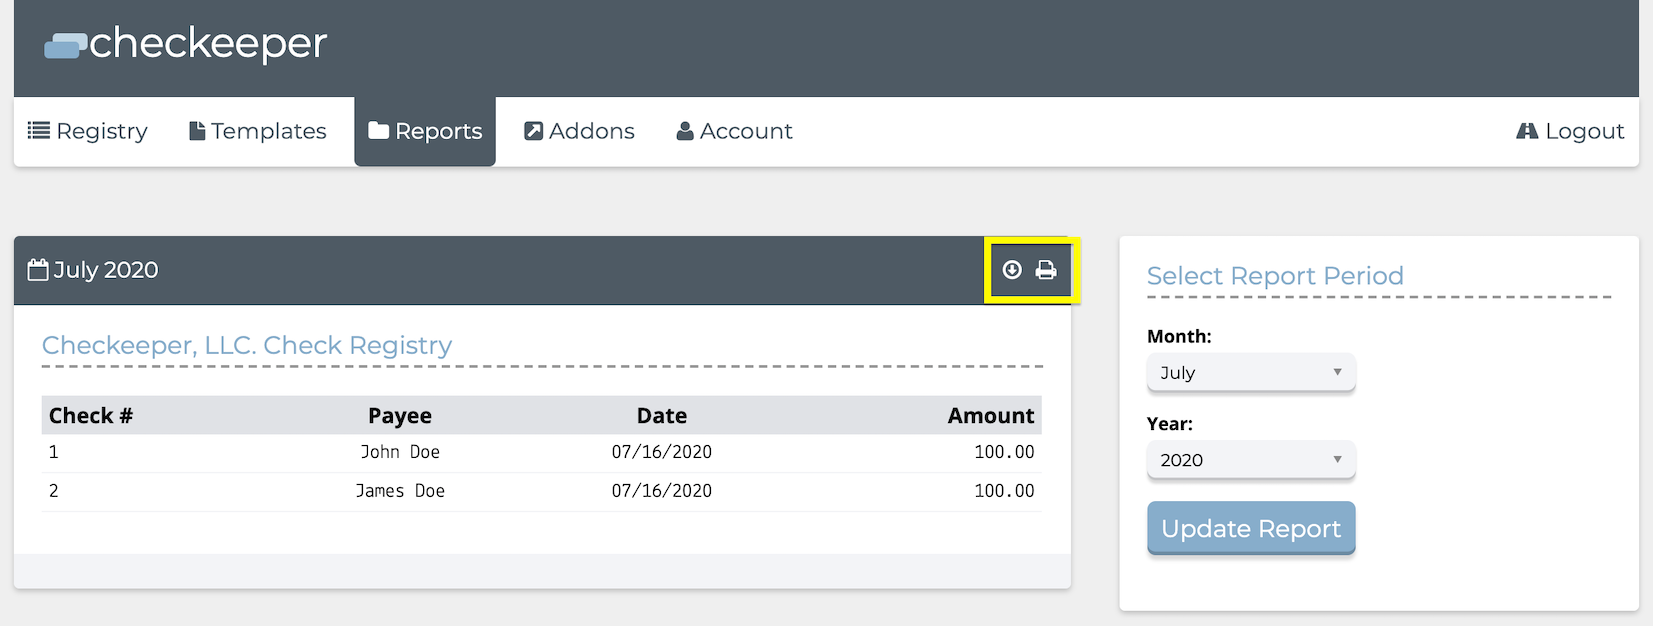
This next method might be a little tedious if you're wanting a record of your entire registry. But it's great for keeping track of your payment history month-to-month. Under your reports tab, simply select the period you want a report for, and you can either download or print that file. Then, repeat this process for any payment period(s) you want to keep for your records.
Take a Screenshot of Your Registry Page
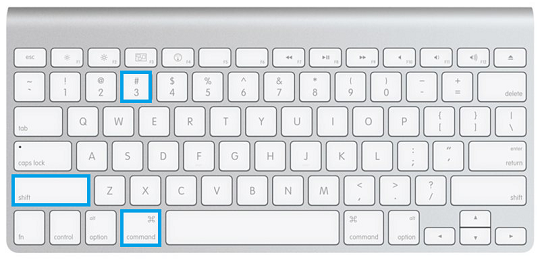
If you're relatively new to Checkeeper and don't have a ton of checks in your registry yet, you can always just take a screenshot of your registry page. It only takes a couple clicks in Windows (windows key + s) or Mac (command+shift+3), and then you won't have to log into your account every time you want to check out that payment history.
For more cool tutorials that'll help you make the most out of your Checkeeper account, check out our blog!